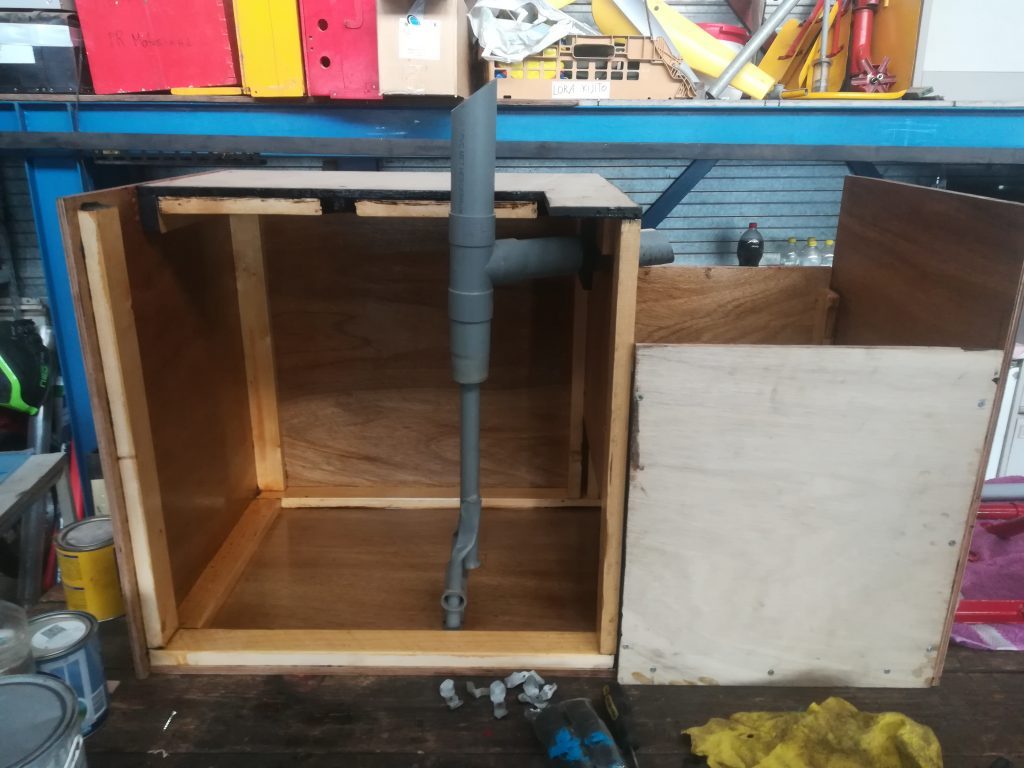
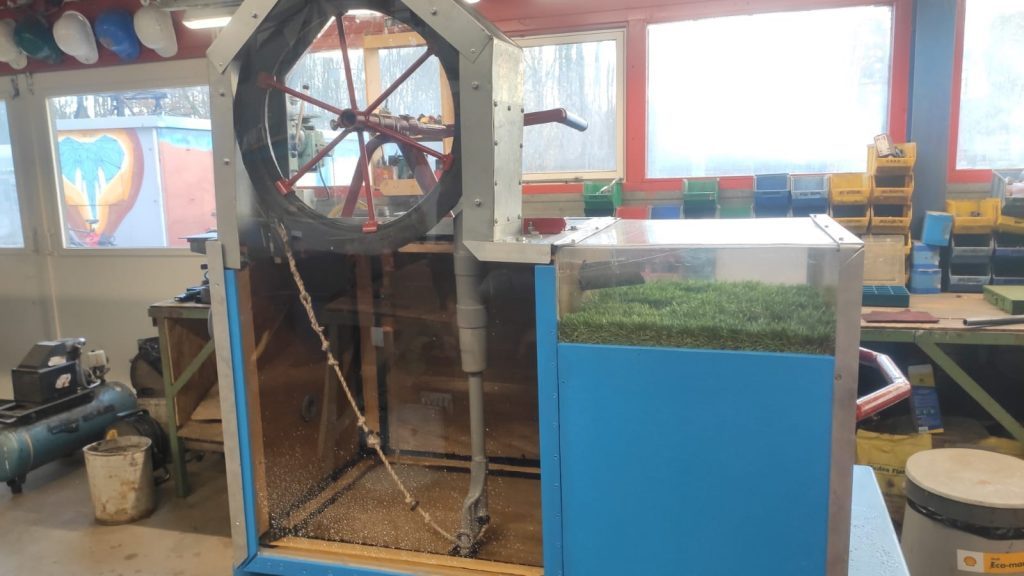
Archive for 2020

Comparing irrigation systems in our garden

Sunday, December 6th, 2020 No Comments

At the beginning of this year several irrigation systems have been tested in the vegetable garden at the WOT. The aim of this project was to find a low cost but efficient method to irrigate crops. Three systems were tested: a bought transpiring hose, a system made from terracotta pots, and a system made from plastic bottles or jugs. To read more about the setup please read the previous blog on this project.

The garden has a relatively small area (approximately 4m x 4m) and multiple crops were grown in it. Therefore a quantitative analysis cannot be justified. Instead of looking at the crop size, the practical considerations are tested. Below is a table that summarises the findings.

Effectiveness   Cost  Complexity
Irrigation hose + +/- ++
Ceramic pots ++ +/-
Plastic jugs ++ +

Irrigation hose

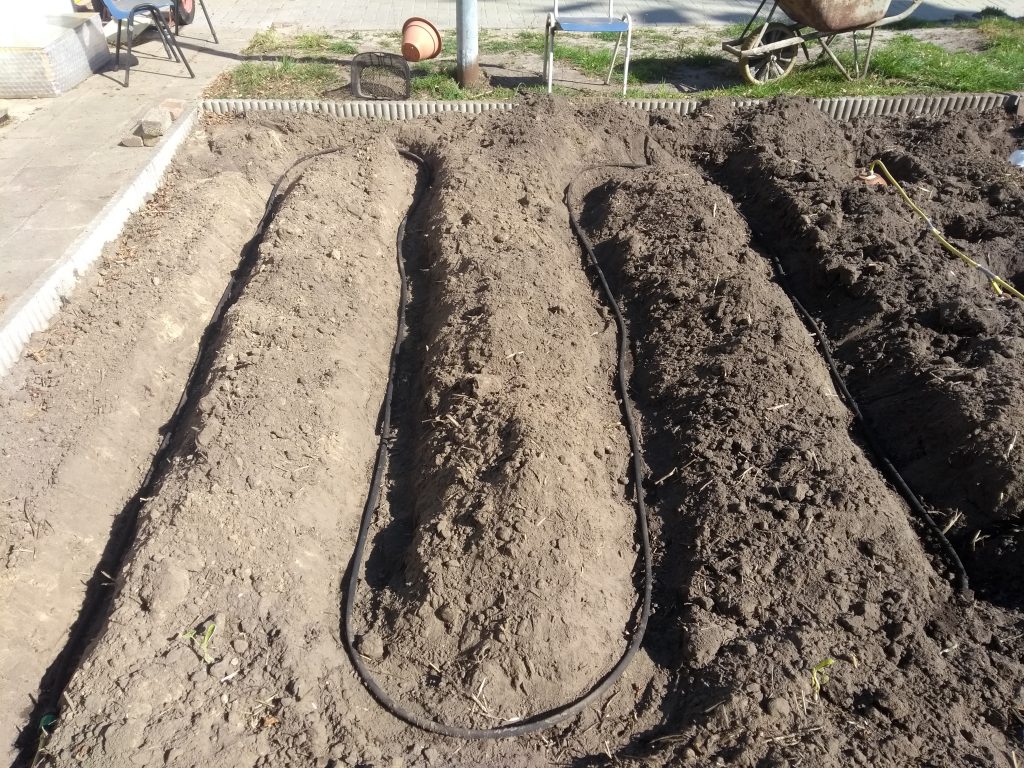
The irrigation hose was off the self and installation was simple. With a conventional garden hose the tube was connected to the water tank. The hose was buried at 20 cm so it would hydrate the ground below the surface. Often, however, the ground at the surface was dry. In general this is an advantage because moisture on the surface may evaporate. Also, weed growth is less. However, when seeds have just been sowed or the crops are still small, they cannot reach the water and thus spraying the surface with water was still necessary.


It should be noted that the pressure in our system was low (0.1-0.2 bar) because it was connected directly to a water tank. If the irrigation hose is connected to the tap (2-3 bar) maybe the water will reach the surface of the ground.

Ceramic pots

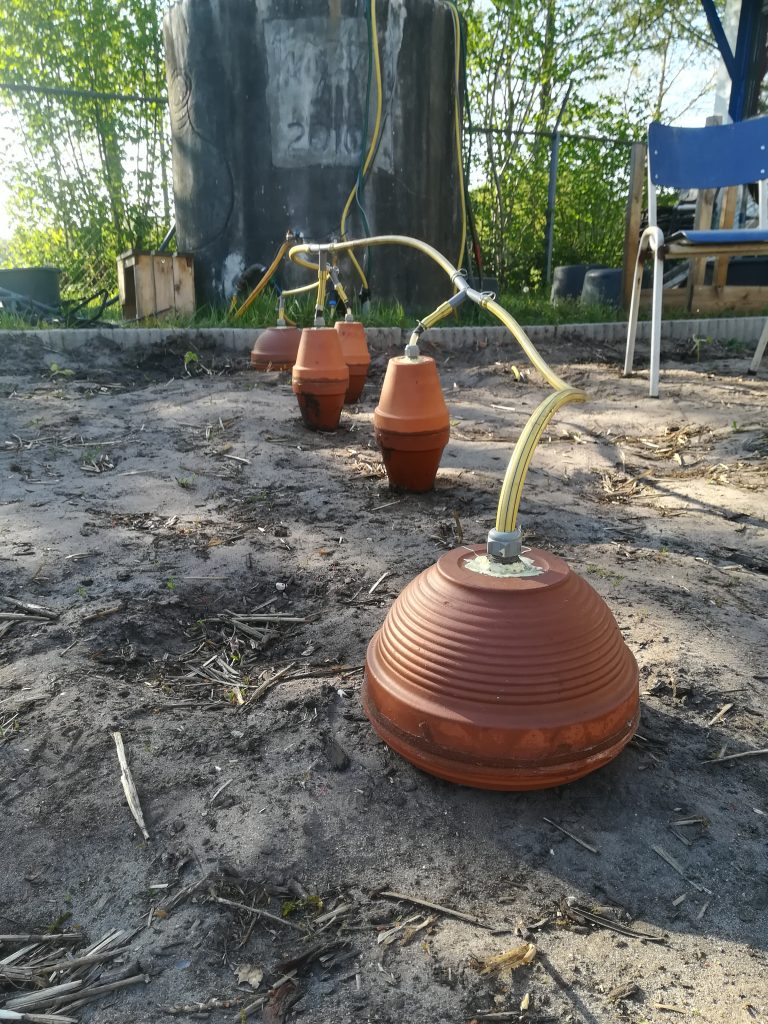
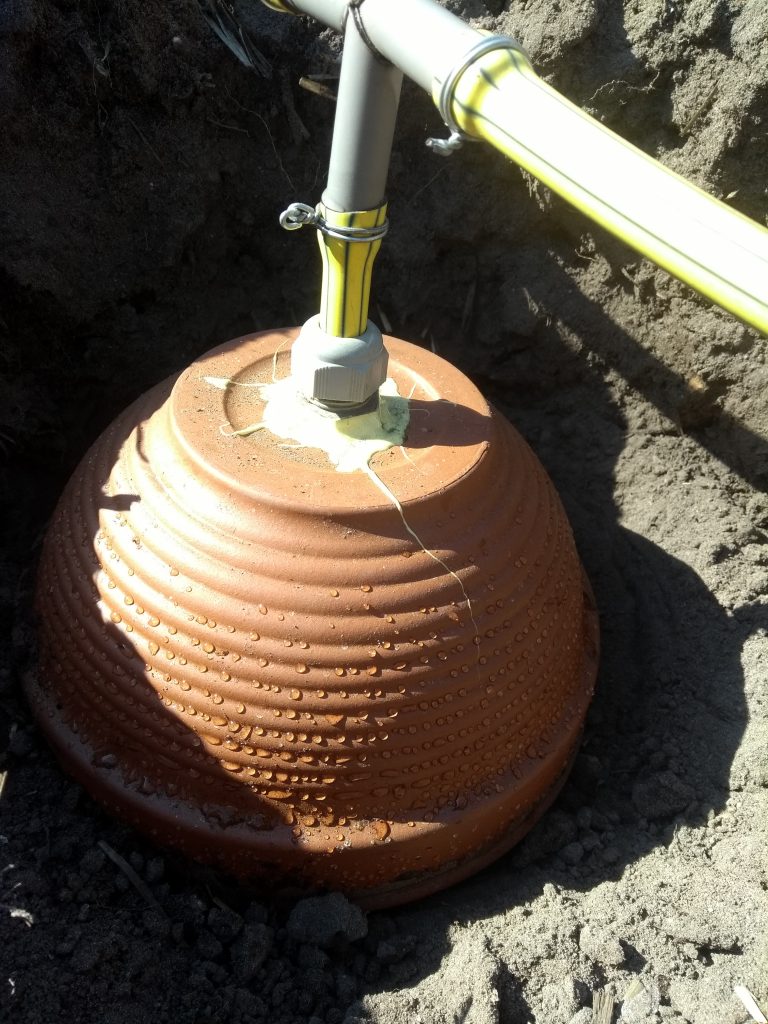
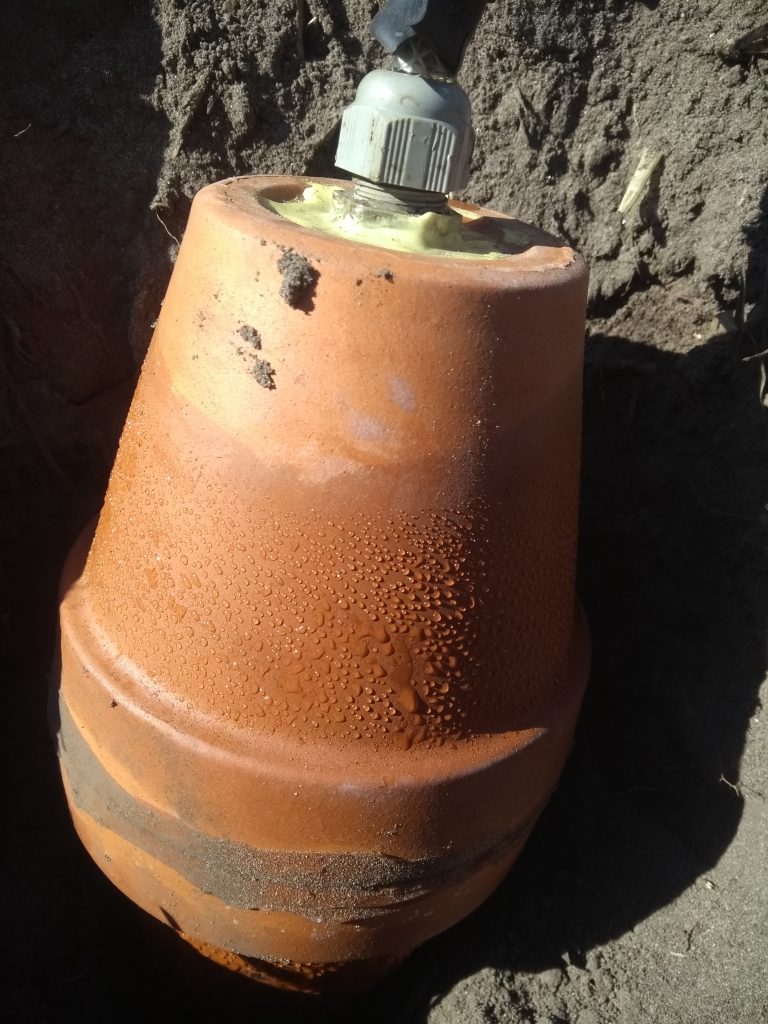
The installation of the ceramic pots required much more work. Pots needed to be sealed together, unwanted holes had to be sealed and a system had to be made to connect a hose to the pot. Then the pots were buried and connected with T-joints to the water supply. The price of such a system is comparable or higher than the price of an off-the-self irrigation hose.

The pots did however perform best with irrigation. Because they have a large height they distribute water deep in the ground as well as near the surface. This irrigation setup is therefore also suitable for seeds or young plants.

Plastic Jugs

The plastic jugs are the cheapest solution since waste materials can be used for it. The performance is however not consistent. The working principle behind this system is that because the holes in the jugs are small and the lid is on the jug, air can’t enter the jugs easily. Because of this water also can’t flow out easily. We noticed however that air quickly entered the jugs and thus water quickly flowed out. This is probably because the ground in our garden is loose sand through which air can move fairly easily. In dense clay water will likely disperse much slower. Of course, the holes could have been made smaller to decrease the flow, but the holes were already small and making them smaller would be technically challenging.

Furthermore opening and closing the jugs everytime you water is a tedious task.

Air quickly entering a jug

Conclusion

If you want to irrigate a small patch, irrigations with ceramic pots may be interesting. Especially if you can get a hold of specially designed irrigation pots. Connecting such a system to a water storage for continuous supply is rather complex and expensive. If you prefer a more cheap and low tech solution the plastic jugs could be a good option. It is a good idea to first do some tests to see if the holes are the right size and if your ground is suitable.

If you want to irrigate a larger area, the self irrigation hose is a good option. Be aware that if you connect it to a water storage the pressure is generally low and the hose might function less well.

In the future, the WOT might research irrigation methods that are low tech and cheap but also easy to manufacture locally.

New Windpump gearbox design

Monday, October 12th, 2020 3 Comments

During the last working weekend at three and four october progress has been made with the new gearbox design test setup.
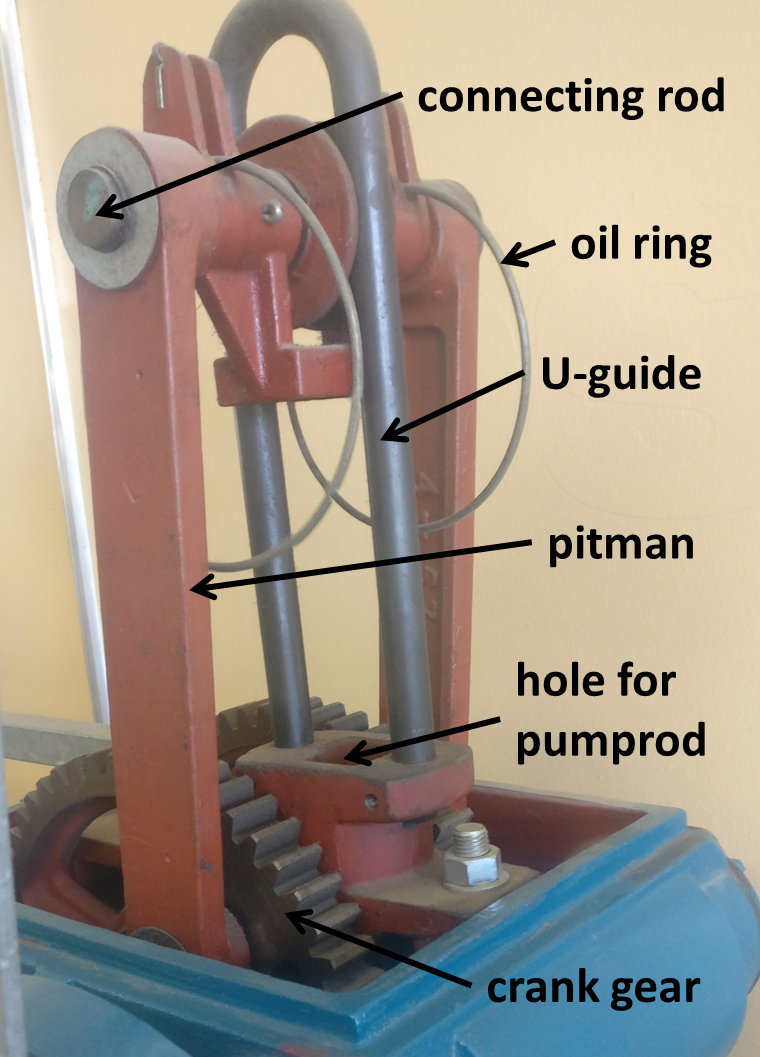
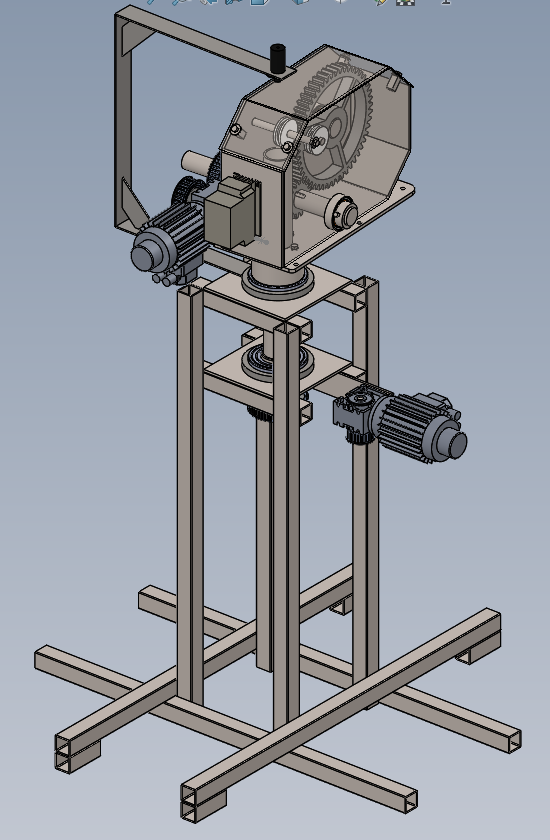
This new gearbox design has a couple of unique features for windpumps which have a gearbox between the rotor and pumping rod (to slow it down and increase the pumping force). These type of wind pumps are widely used in South Africa. The following text is from my internship report on the design of a new wind pump which was mainly focused on the rotor but also adresses the gearbox shortly:

Gearbox of a Climax windpump

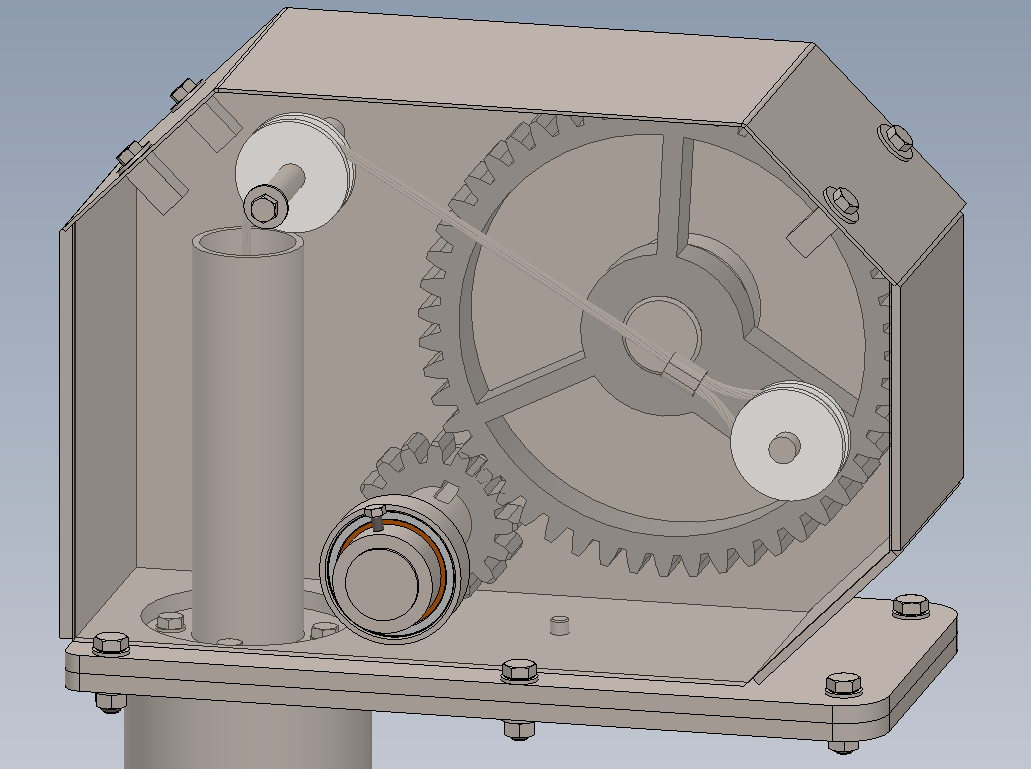
To ensure starting at low wind speeds and deep boreholes a gearbox is needed in these wind pump. Together with the new rotor design a new gearbox was designed which is simple in design and can be maintained easily.
Current gearbox design’s like the Climax and Southern Cross windmills consist of cast iron housings which cannot be welded when broken. Furthermore, there are two sets of gears which have to be synchronised to work properly. The use of solid pumping rods leads to ’knock’s’ in the gearbox which are described in the instruction manual for southern cross.

The new gearbox design

These knock’s are caused by the speed of the pumping rods during the upward stroke. The rod pushes the gears up which results in knocking over of
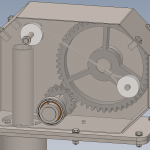
the gears. To prevent this a gearbox with cable is designed since a wind pump doesn’t have to push the pump down in normal operation. To make sure the pump rods will go down springs are added to pull the rods down. Furthermore, only two gears are used with a ratio of 3.2 : 1 which requires 3.2 rotations of the rotor to perform one pumping stroke. The casing consists of welded sheet metal instead of cast iron to make it possible for people with a welding machine to repair it themselfs.

Experimental setup

Since this type of gearbox has never been used before a test-setup is designed to be able to see if the gearbox is working without building a complete windpump. This setup will simulate the rotation of the rotor using an electric motor. The same will be done to simulate the yawing of the windpump. This is expected to be one of the major challenges with this design since the pump will not rotate, but the head of the windpump will. using a stiff pumping rod is not a big deal, but the cable that will be used in this design is not able to resist against torsion. It can be assumed that the windpump will yaw an even amount of times clockwise and anti clockwise, but it is still usefull to know how much rotations the cable will resist without problems.

The bracket around the gearbox is used to make sure that the power cable going to the motor which simulates the rotor rotation doesn’t get strangled up. Furthermore, ball bearings are used as yawing bearings which happened to be quite a challenge to install. So in the final design friction bearings will probably be used since they are much easier to install, allow for less tight tolerances and are more resistant against dust and moisture. But for this proof of concept it won’t affect the results.

Besides this there will be a couple of other things be tested during manufacturing and testing:

  • Effect of yawing on the cable
  • Easy manufacturing without expensive precision tools
  • Oil consumption of the gearbox (how oil tight can it be?)
  • Failure modes
  • Maximum load

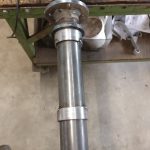
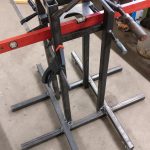
Currently the frame of the setup is tagged together, the gearbox itself is tagged together and the different bearing housings are finished. The big gear is machined, only the teeth have yet to be touched with an angle grinder to make it ready to use. The next step is to manufacture a new ‘rotor’ axle since the current one turned out to be bent. Furthermore, manufacturing of the axle for the big gear which has some tight tolerances.


Visit Happy Green Islands

Tuesday, September 1st, 2020 No Comments

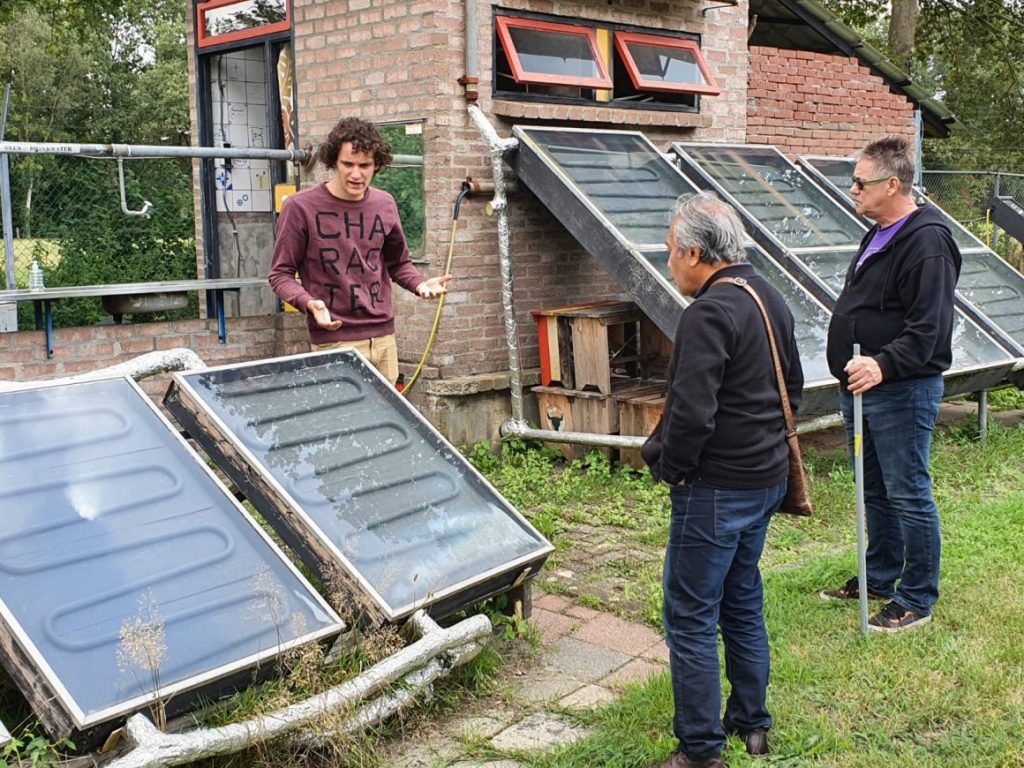
Last weekend several members of the organisation Happy Green Islands visited the WOT terrain to look at all the demonstration models and to discuss a possible collaboration.

Happy Green Islands is an organisation that focuses on the waste problem on small islands in the moluccas. On these islands there is no well organised system to deal with waste and most of it ends up in the ocean.

Although waste management is not something the WOT has much experience on, we think it would be interesting to see if our practical knowledge could be of use to help HGI. Furthermore already existing technologies on water and energy supply could prove useful on the islands in the moluccas as well. We hope to start one or more projects based on this collaboration.


Introduction activities

Friday, August 14th, 2020 No Comments

Click here to sign up for activities.

  • Open day

Wednesday 2 September

Tour on our terrain and introduction to projects.

  • Open day

Wednesday 9 September

Well drilling workshop and marble pump workshop, optional tour.

  • Project evening

Wednesday 16 September

Learn more about the projects the WOT has to offer.

  • Pubquiz

Thursday 17 September

The one and only WOT-pubquiz!

  • Workshop course

Wednesday 23 September

Learn to use machinery from our workshop.

  • Lecture wind energy

Wednesday 30 September

For beginners, no worries 😉 Also possible to work on projects.

NOTE: the activities listed at the end of the video are no longer up to date


Kijito pump maintenance

Wednesday, May 27th, 2020 No Comments

During the last few months there were problems with the safety system of the Kijito windmill. The breakpin snapped much more frequently than usual. Last year the Diever had the same problem, then because of rising sand level in the well. Sand clogged the pump and caused frequent snapping of the breakpin, which was solved by dredging out the well. We assumed that for the Kijito the problem would now be the same and that dredging would solve our issues. This turned out not to be the case.

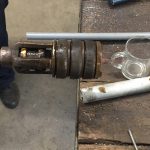
After removing the pump we noticed that the piston could get stuck in the higher range of its movement. This was a bit hard to spot, it is normal for the cups to sit quite tightly. In this case it was the support rings that got stuck; we noticed it because of some wear on the brass.

In 2017 the pump under the Kijito windmill had been removed for replacement of the cup leathers. Back the cylinder was quite stuck and we used a lot of force. This caused the cylinder to become very slightly oval shaped on the top. It is likely that this is what caused the piston to become stuck. Over time the brass of the cylinder was damaged and a small rim was formed.

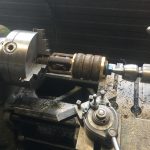
Sanding down the rim proved quite difficult, but some efforts were made (professionally cylinders can be “honed” to make them perfectly round again). To be sure that the piston would not get stuck again, we used the lathe to shave a few millimeters off the cup support rings.

Our advice: when the safety on a windmill fails repeatedly, you will find yourself tempted to use a heavier breakpin. Always first inspect your pump. The safety is there for a reason. Should you see damage to the piston, expect damage to the cylinder as well.


Working weekend March 14-15

Saturday, May 16th, 2020 No Comments

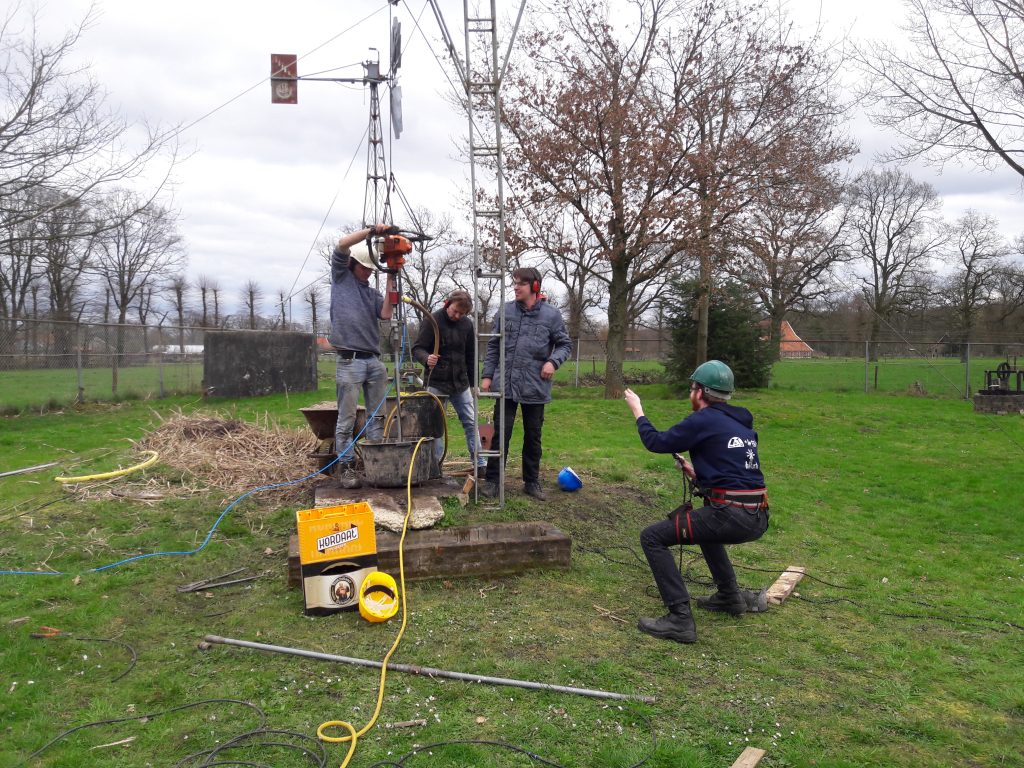
Several weeks ago, just before the wot had to close due to the effects of the coronavirus, a working weekend was held. A lot of people were present, a lot of work has been done and the atmosphere was great.  A new method of airlift drilling was tested, the cubicle of the outside shower was replaced, maintenance was done for the bicycle rope pump, the lustrum tiles were put on the wall of the indoor solar shower and work has been done for an experimental irrigation system.

You can read more about the airlift drilling here.

Solar shower cubicle

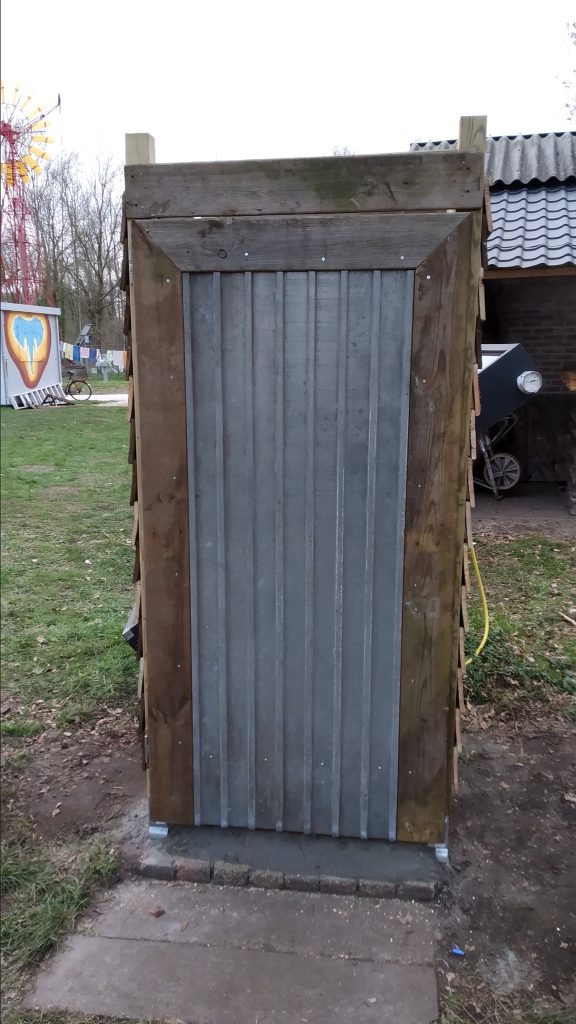
Now that the solar collector of the outdoor solar shower has been renewed, the rickety shower cubicle could not be left behind. This was made clear on a stormy day when half of the stall was blown apart. The working weekend was therefore a good time to pick up this project thoroughly.

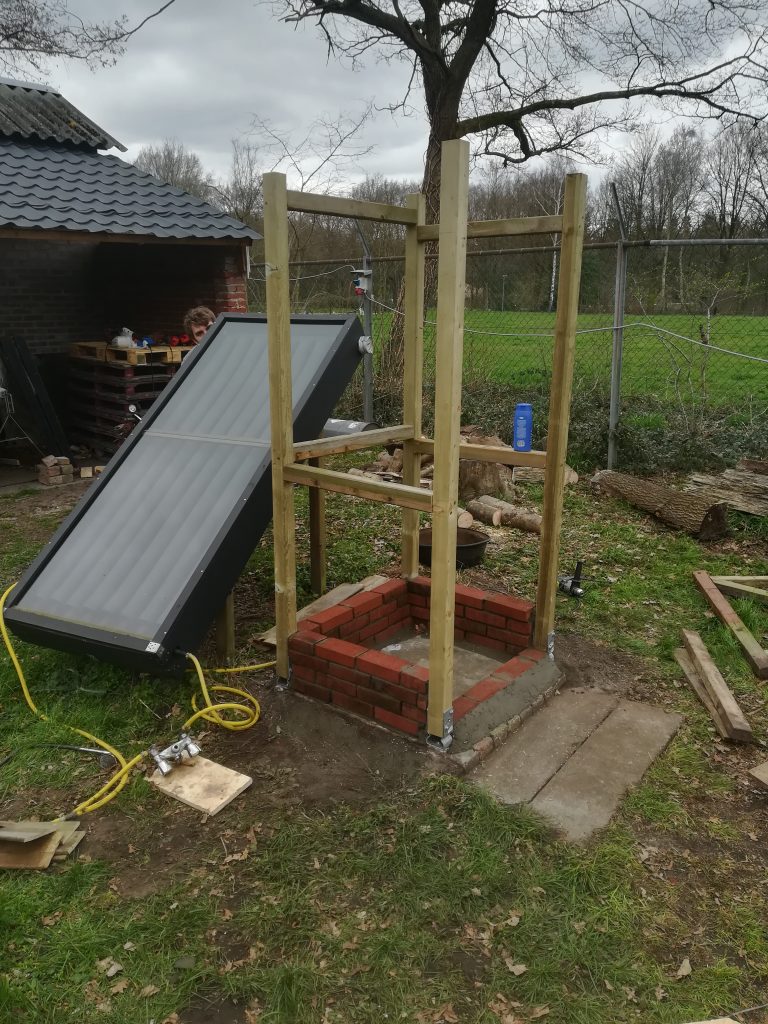
The concrete foundation, in which a drain pipe was poured, was still perfectly usable. The plan was to make the walls of recycled fence boards. The underside of the walls would be made from bricks to prevent the wood from being in constant contact with water. Besides, the expectation was that this would give a good looking result.

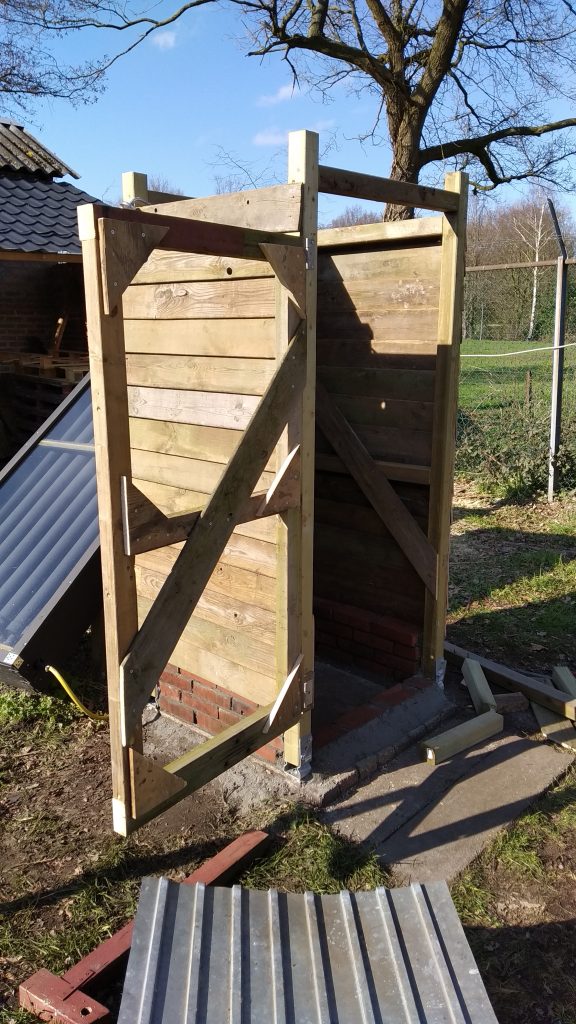
Wooden posts were placed on each corner of the booth, which was attached to the foundation using a U-profile. With the base frame in place, two teams could work simultaneously on the masonry work (Allard and Kasper) and on the planks and crossbeams of the walls (Joost, Victor, Michelle and Willem). This was no easy task for a cubicle measuring just under a square meter!

At the end of the weekend, the stall stood proudly in front of us. The water tubes and the shower tap were also reinstalled by Willem. The masonry still needed mortar joints, but for this the masonry had to harden for two weeks. Also, the door was not yet completed and the shower lacked a roof. Joost finished the door a day later and Kasper later added the mortar joints. The roof is still missing, but the old door can possibly be reused for this.

Bicycle rope pump

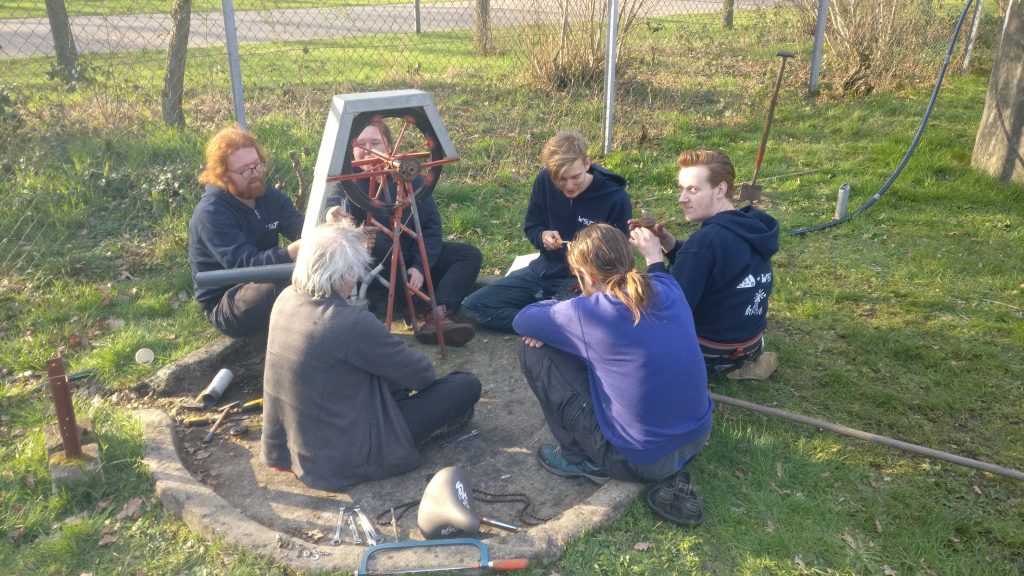
Also the bicycle-powered rope pump was provided maintenance. With a new bracket to hold the pump and the return tube. After this the old paint was sanded off and a new layer was applied to help this pump stay rust-free.

5 WOTters watching, 1 WOTter works

Tiling of the indoor solar shower

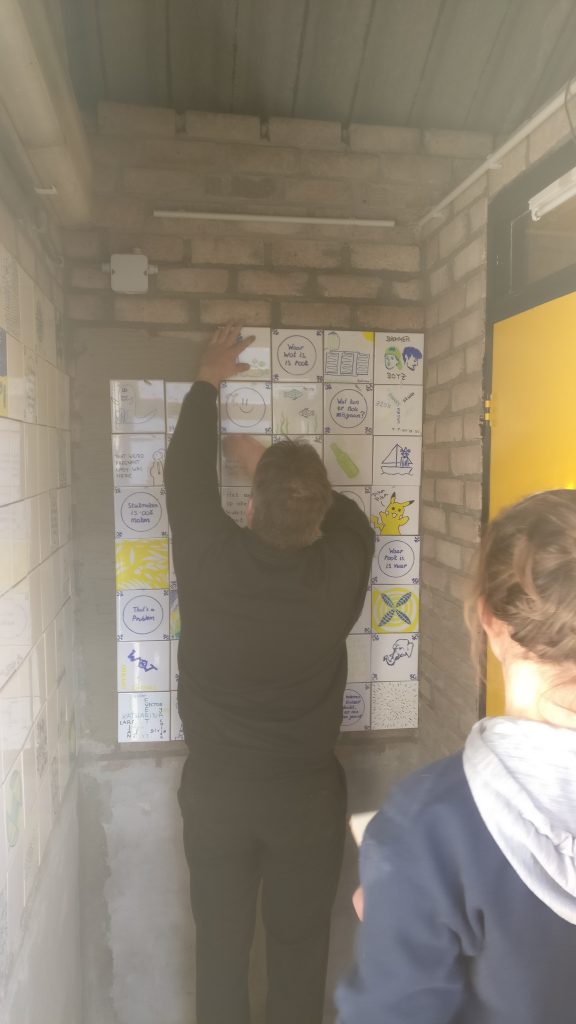
Previous year, as a lustrum activity, tiles were decorated by the WOT-members so that they could add some flair to the walls of the indoor shower. It did take some time however before they were also actually placed on the wall. This weekend the task was finally started with. At the end of the day this resulted in a beautiful wall, to which a lot of members contributed. Only some finalising still has to be done.

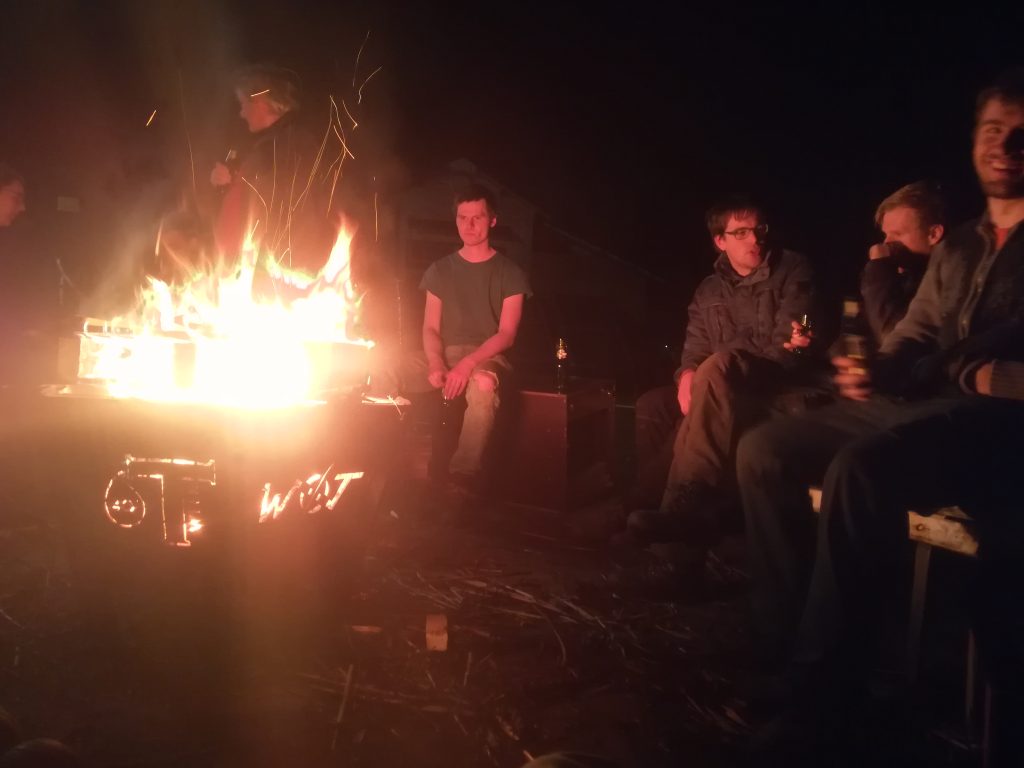
Of course no working weekend would be complete without a campfire


Experimental irrigation systems

Thursday, May 7th, 2020 No Comments

Besides all the handpumps, windmills and solar collectors, the WOT-terrain also maintains a garden bed for growing vegetables.

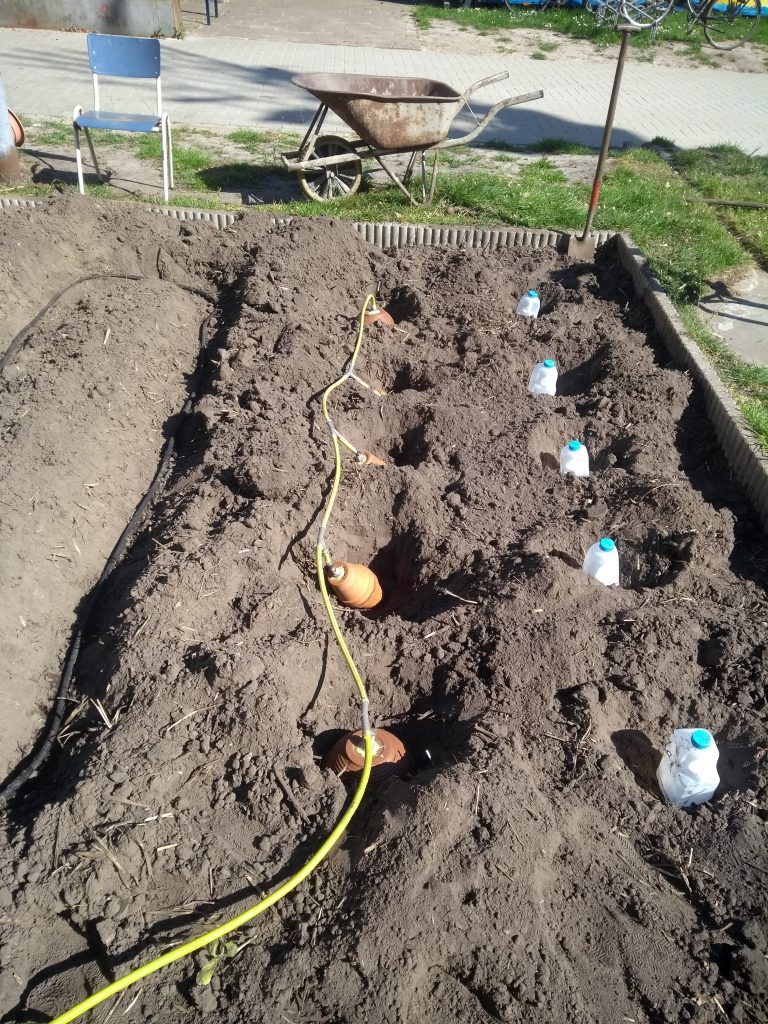
For irrigation 3 different systems are tested in the garden. A bought irrigation hose, a flower pot based system and a system made from plastic milk bottles. The systems are applied in rows perpendicular to the rows of different vegetables. The conditions on the field are relatively constant but it is only a few square meters so drawing conclusions on the yield of the plants is not really justified. The main goal of the experiment is to discover advantages and disadvantages of the systems and not to perform a scientifically justified comparison. First all three systems will be described, later updates will be placed to comment on the systems.

Irrigation hose

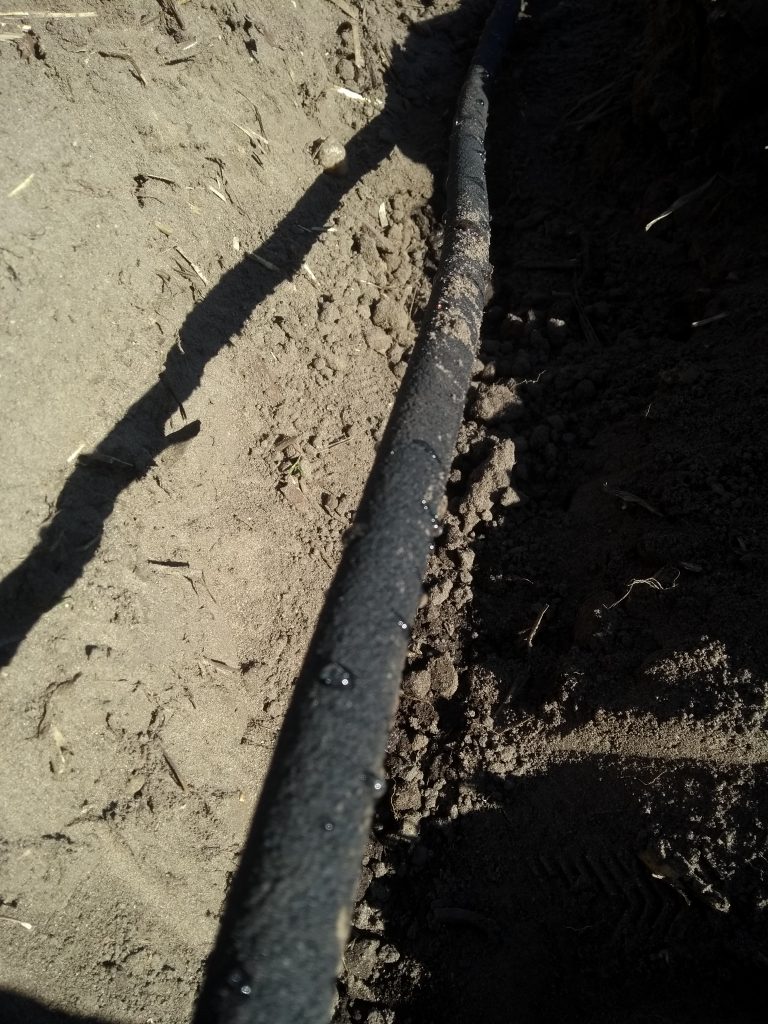
First of all there is the irrigation hose. This is a readily bought polymer hose produced by REHAU. The material of the hose possesses the property to ‘sweat’ so that when water is inside this slowly enters the soil. To ensure a constant water supply, we’ve connected this pipe to our water tank. The pipe is buried at a depth of approximately 20 cm.

Because the water directly flows into the soil less water evaporates.The company claims that by using this system correctly, up to 70% of water can be saved compared to conventional watering. A 15 meter pipe was bought for approximately 20 euros.

Close-up of the ‘sweating’ hose

Ceramic Plant pots

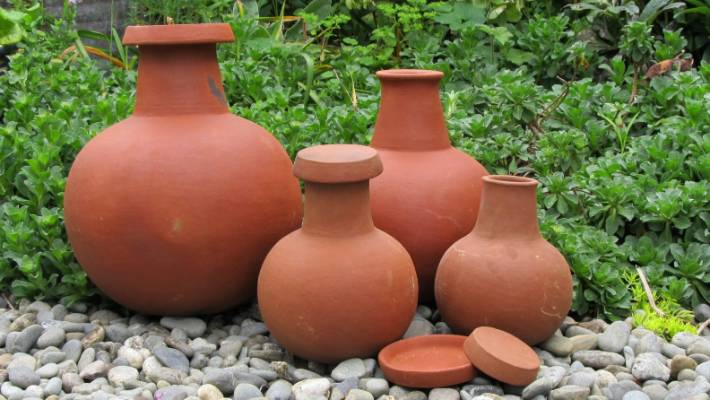
The second system is based on flower pots. Unglazed ceramic pots possess a similar property to that of the irrigation hose. The material is porous and when there is dry soil around the pot water is ‘pulled’ through the material. When the ground is wet however, less water will flow through the ceramic material. This method is a proven system for irrigation and so called ‘ollas’, pots with a large body and a smaller neck, have been used for a long time. The pots are buried and plants are placed in the vicinity of the pot, the roots grow towards the olla and the plants always get the right amount of water.

Pottery with a shape similar to the ollas, relatively expensive in the Netherlands and the skills to make them ourselves we do not possess. Therefore we decided to make our system out of unglazed ceramic flower pots. These are both cheap and readily available. The large opening of the pots were closed off with other pots and sealed with sealant. The hole in the bottom of the pot was fitted with a cable gland so that a garden hose could be attached to it. Several of these pots were connected and attached to the water supply. Two different designs have been made.

Plastic jugs

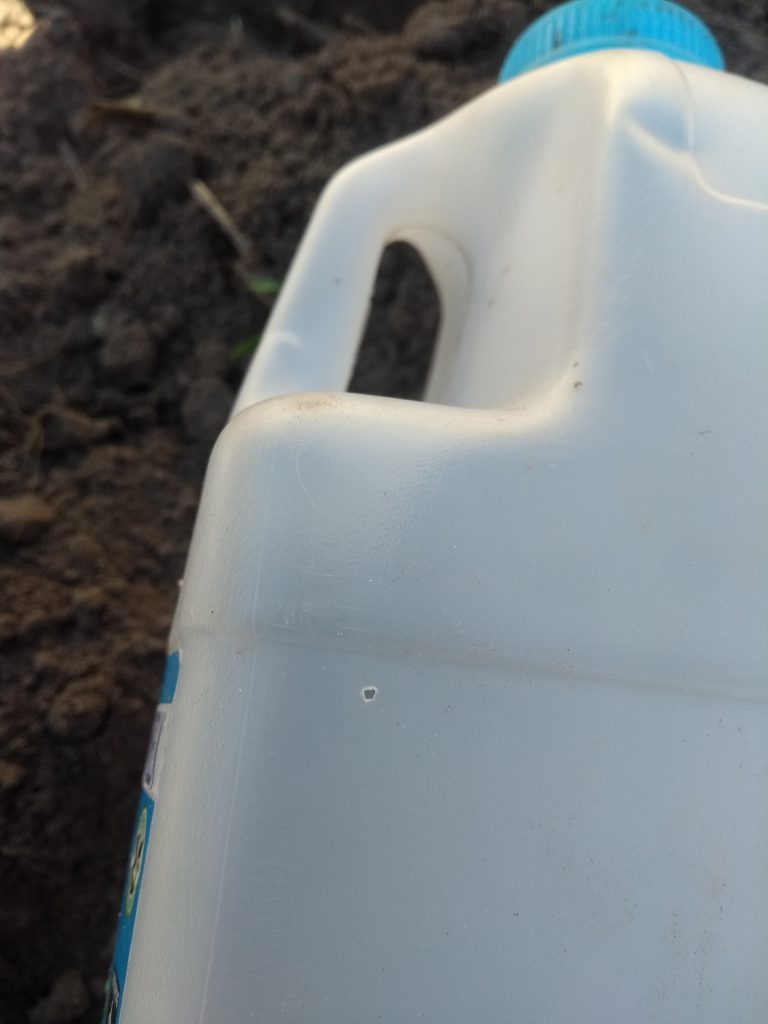
Finally a system made of plastic jugs is tested. Small holes are poked in an empty plastic milk jug. These jugs are buried, filled and the cap is fermly put on. The principle behind this method is that because the cap is on and because there are such small holes, air can’t easily enter the jug and thus water doesn’t flow out easily. Because of this water is dispersed over a large amount of time. Also if the ground is wet, possibly, this causes the water flow to decrease even more since less air is present in the soil. Because we did not know the effectiveness of this method and we didn’t exclude the possibility that water would flow out at a to large rate, we didn’t connect this system to the water storage for a continious water supply. The jugs were to be filled manually.
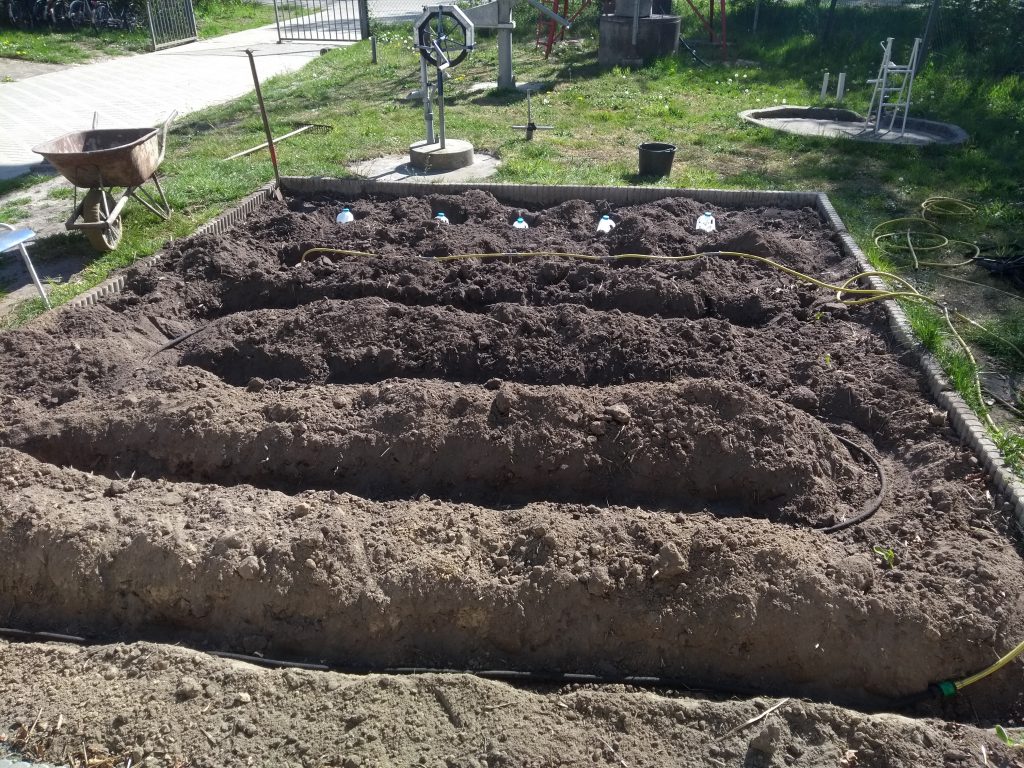
A small hole in the milk jug

Below are some pictures of the setup of the complete system. Updates of the operation of the systems will be given in the future.

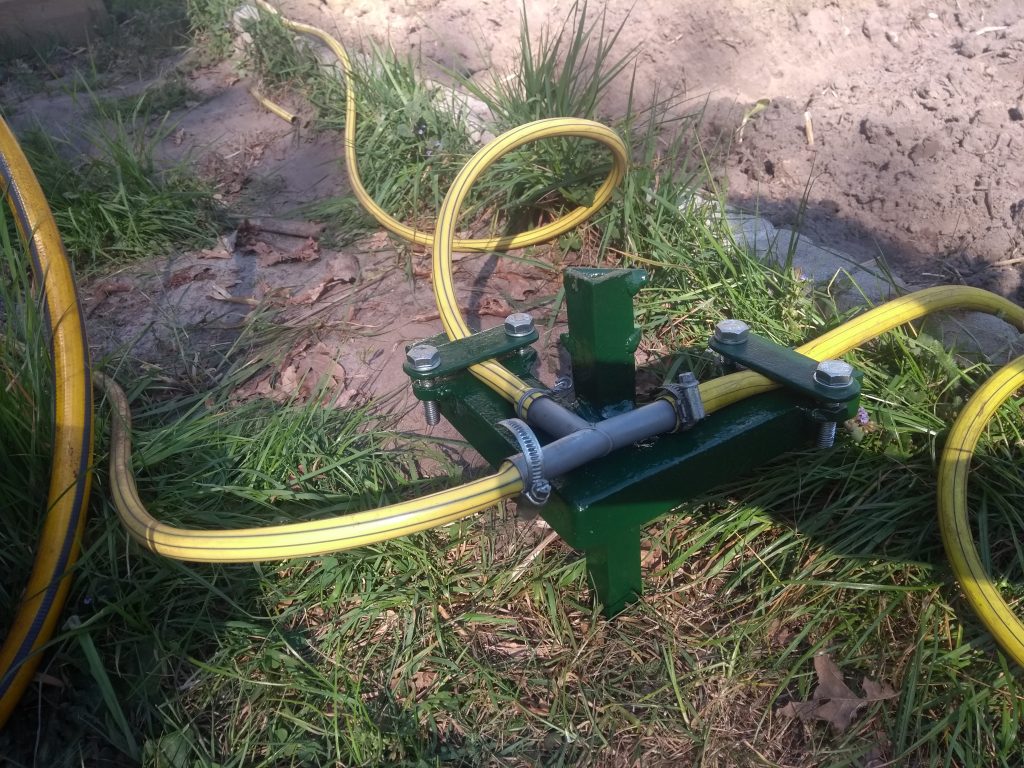
Flow controll

In order to be able to control the flow going to each system, a clamping system was made. It is shown below. One tube goes to the irrigation hose while the other goes to ceramic pots.


Update airlift drilling: Motorised drilling

Monday, April 6th, 2020 9 Comments

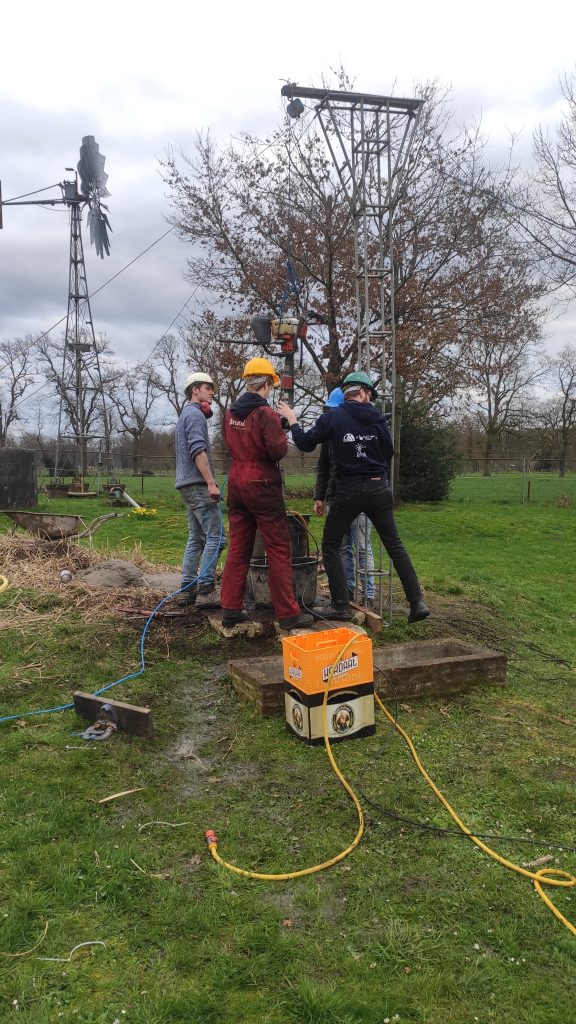
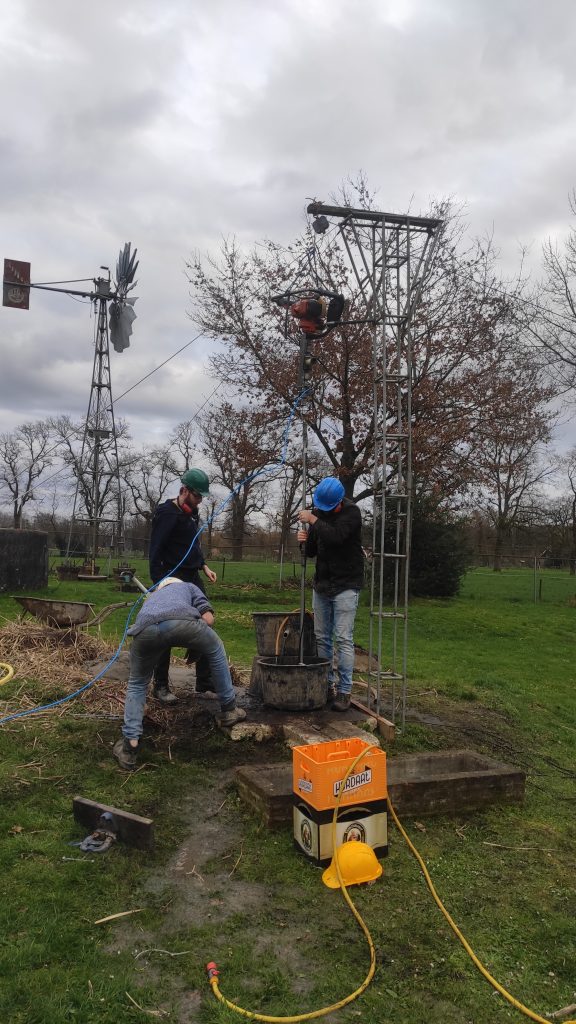
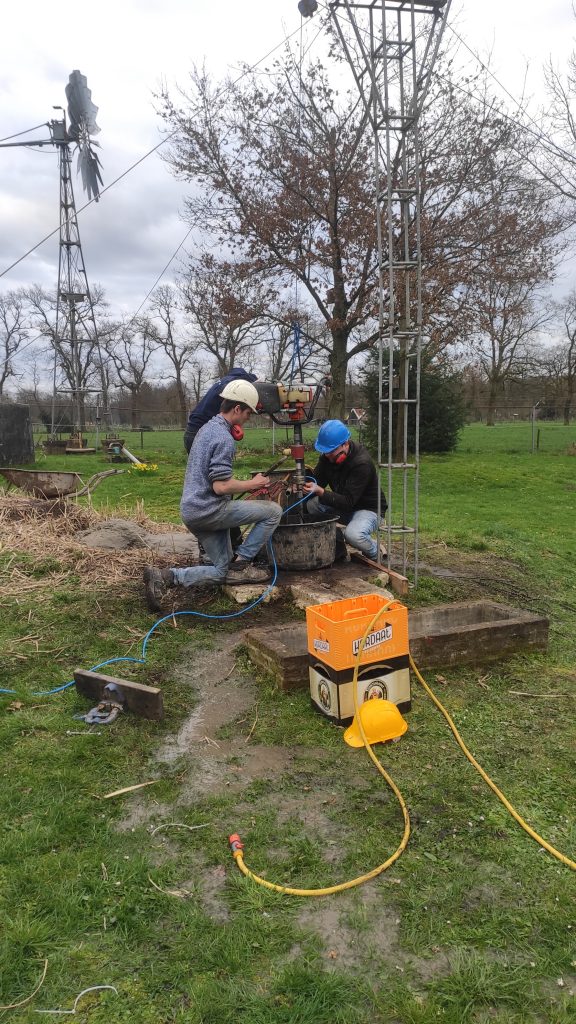
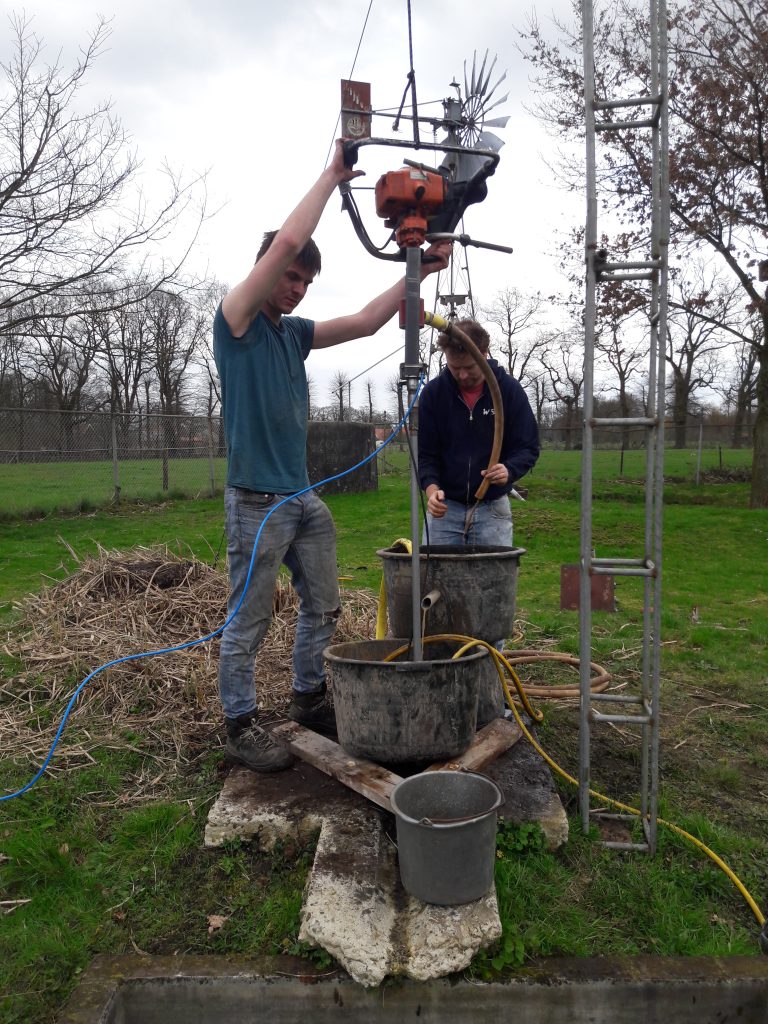
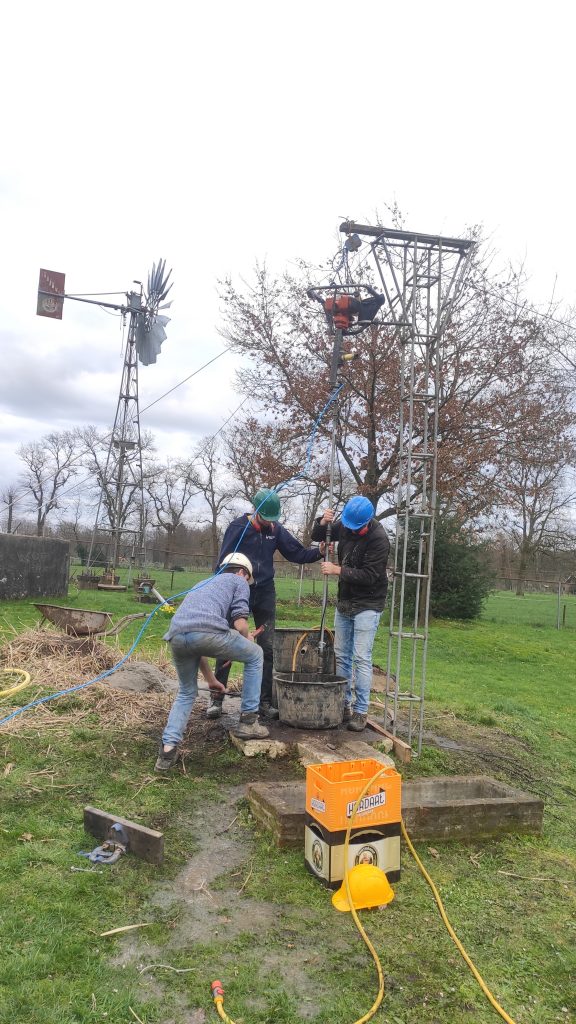
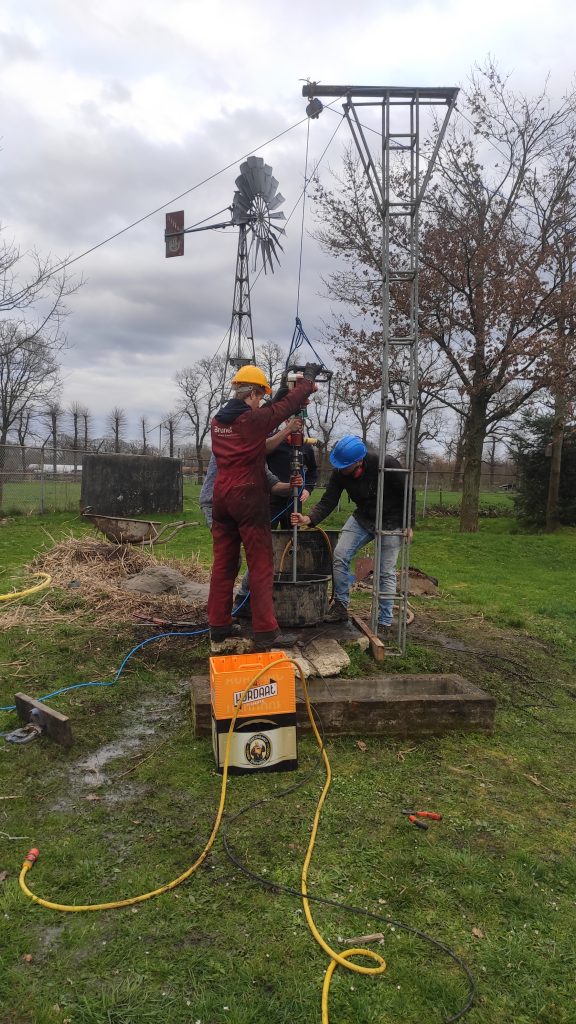
A new experiment with airlift drilling is performed at the WOT. A motor of a petrol auger was used to drive the drill stem of the airlift drilling method. This produced a continuous rotational movement, so two couplings were required. One for the outlet of the drilling fluid and air mixture. Another one to couple the pressurized air hose to the drill shaft.


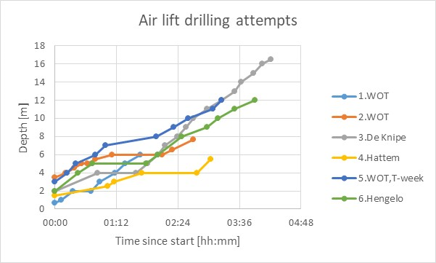
The main advantage of the system compared to the previous manual setup was the increased drilling speed. The maximal speed was measured to be 12 meter per hour. The record with manual shaft rotation was 7.5 meter per hour. However, the average speed of the whole borehole was only 5.4 meter
per hour. This is not a very large increase, compared to the 4.5 meter per hour during manually rotating in an earlier test.


This is mainly because changing the pipes was more time consuming since the motor was attached to them. Also, starting the petrol engine was hard, as the engine was unwilling and at an unpractical location for starting. The couplings for air and water, which were finished a day before the test, performed perfectly. The air coupling was not leaking up to a pressure of 8 bar. Thanks to Hedzer and Haye who helped to turn them to specifications.
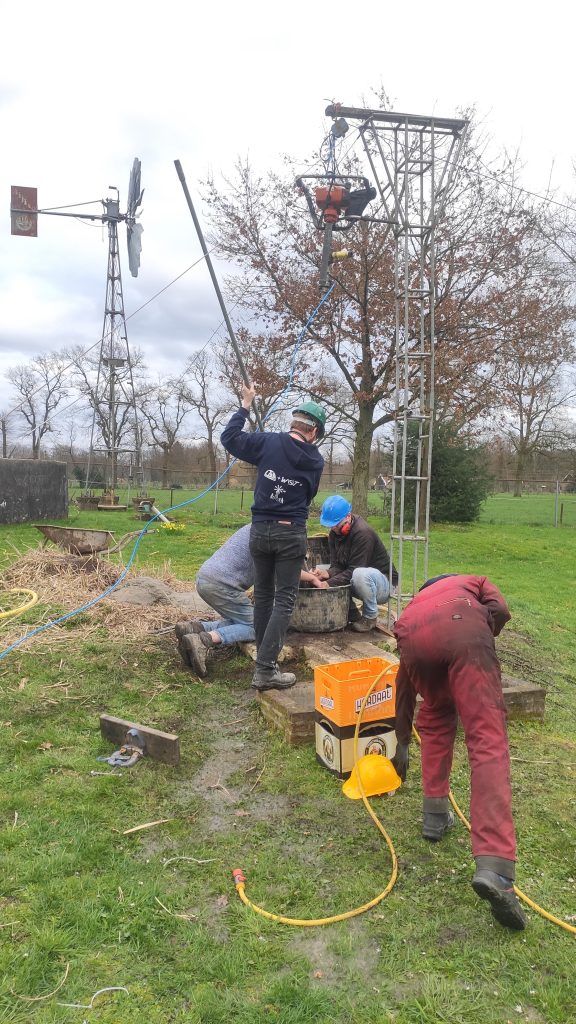
Problems with starting the engine


There is the option to make a new test setup with a proper rig to guide the motor assembly. Also, an updated version of the air and water coupling can be made, where the length of the coupling assembly will be decreased (currently ~45cm long). A pipe clamp can be mounted on the rig, to hold the pipes during adding and removing. Changing pipes is then preferably done with three-meter pieces at the time, to minimize the time spend on it. The average speed of drilling can come very close to the 12 meter per hour (in Dutch soil) with these upgrades.


Product development at the WOT: Drilling with compressed air

Saturday, February 22nd, 2020 Comments Off on Product development at the WOT: Drilling with compressed air

(An update on this system using a motorised drill can be found here)

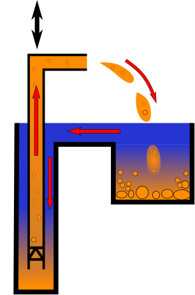
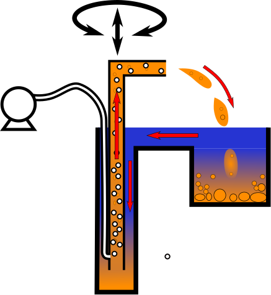
The WOT has years of experience with manual well drilling with the Baptist- and EMAS method. Both methods require tools that can easily be manufactured in a workshop with readily available materials. De drilling sets can be made in a simple workshop with an angle grinder and a stick welder. Because of this, the methods can be used in remote areas. The baptist method, developed by Terry Waller, uses the principle of an inertia pump. The drilling set essentially consists of a drilling pipe with a one-directional valve which is moved up and down in the well. If the downward acceleration is higher than the gravitational acceleration, the drilling fluid (which contains the sediment) will be accelerated up the drilling pipe. Because of this, water with sediment can be transported to the surface where it enters a basin. The sediment will settle and clean water flows back into the well via a small duct.

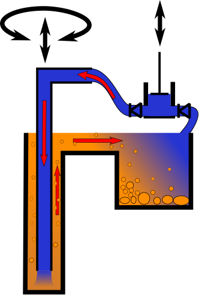
The EMAS method is developed by Wolfgang Buchner. Here the water flows in the other direction; via the drilling pipe water is pumped down with a manual pump. Then the water flows upwards through the annulus taking sediment with it. The dirty water enters a basin and the sediment sinks. The clean water can be pumped into the well again.

The higher the speed of the drilling fluid, the more particles can be taken along. An advantage of the Baptist method is the fact that the drilling fluid is brought up through the drilling pipe. Because the drilling pipe has a relatively small cross-section compared to the annulus, high fluid speeds can be achieved with a small amount of volume displacement. The EMAS method uses the annulus to transport the sediment up. This means that if the diameter of the well increases more volume should be moved to achieve the desired velocity, or the diameter of the pipe should be increased, but this increases the weight which is undesirable. Therefore, the diameter of wells made with the EMAS method is limited.

There are many ways to automate the drilling methods to a certain extend. Manual drilling can be a labour intensive job which requires increasingly more effort at increasing depths. Jetting drilling sets are for example available or another option is to replace the manual pump for EMAS drilling with an automated pump. Also, attempts have been made at automating the up and down movement of the drilling rod.


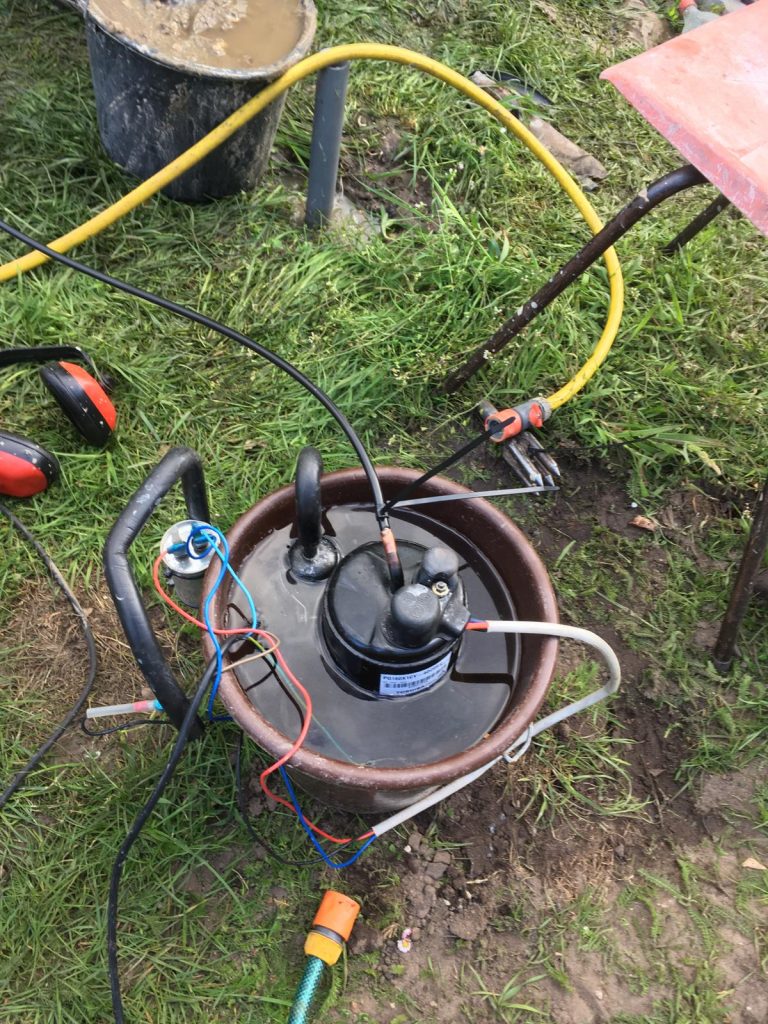
Since 2019 the WOT has been working on another method, which uses compressed air to pump around the drilling fluid. The method uses an airconditioning compressor (Power: 400 W, V ≈ 40 Lpm Atm, Pmax > 20 bar). The hose from the compressor enters the drilling pipe 40 cm above the drill. The air that is injected decreases the average density of the mixture in the drilling pipe. Because of this, it will ‘float’ on the liquid in the well. As a result, the fluid with sediment exits the drilling pipe at the top. It enters a basin where the particles sink and clean water flows back into the well.

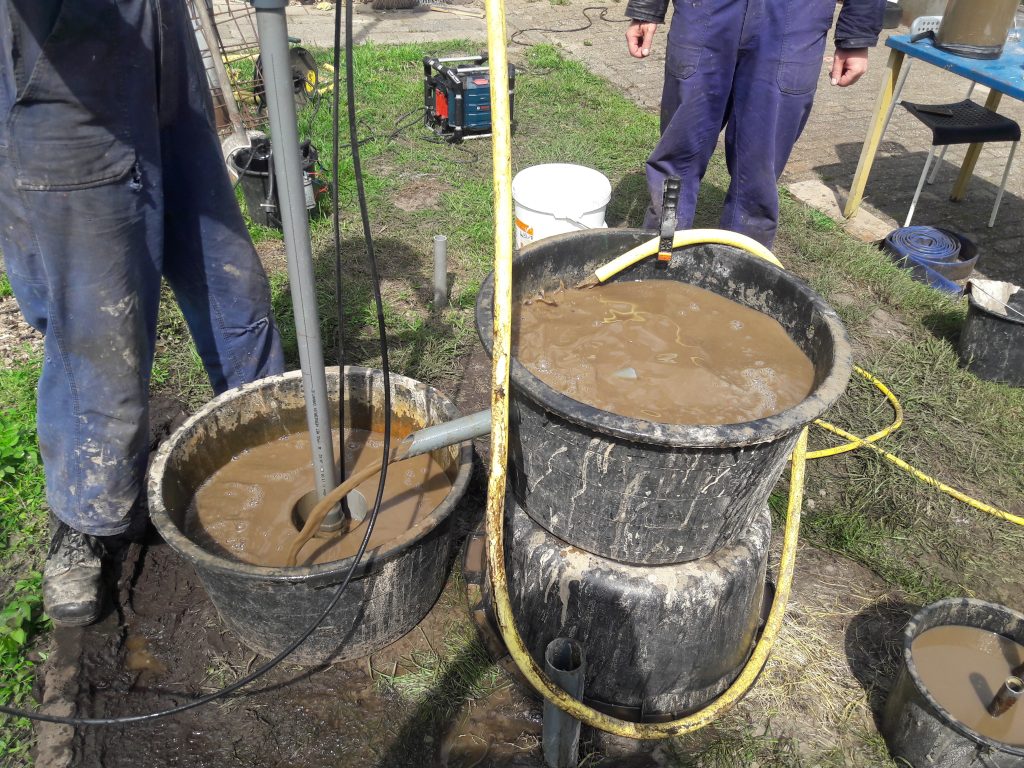
Setup for airlift-drilling (at the background behind the PVC-tube a bucket with the compressor is visible)
The compressor, cooled in water

This method has a few great advantages:

  • The water flows back through the drilling pipe. Because of this, a bigger well diameter can be realised with a relatively small drilling pipe diameter because the flow will stay high (light material).
  • The flow down through the annulus is low, reducing the erosion on the walls of the well
  • A relatively small flow is required to meet the required speed for particle transport. Little work for pumping and thus low electricity costs.
  • No mechanical components (valves, pumps) get into contact with the drilling fluid. So there is no time loss or maintenance needed.
  • Used refrigerator/arco pumps are readily available.
  • Small fuel generators are readily available.

The method is tested 6 times at different places in the Netherlands. Drilling times are measured. The well diameter is about 150 mm in all cases. Factors governing the speed of drilling are mostly the person drilling and the ground type. The average drilling speed (excluding brakes) was 3.8 meters per hour.

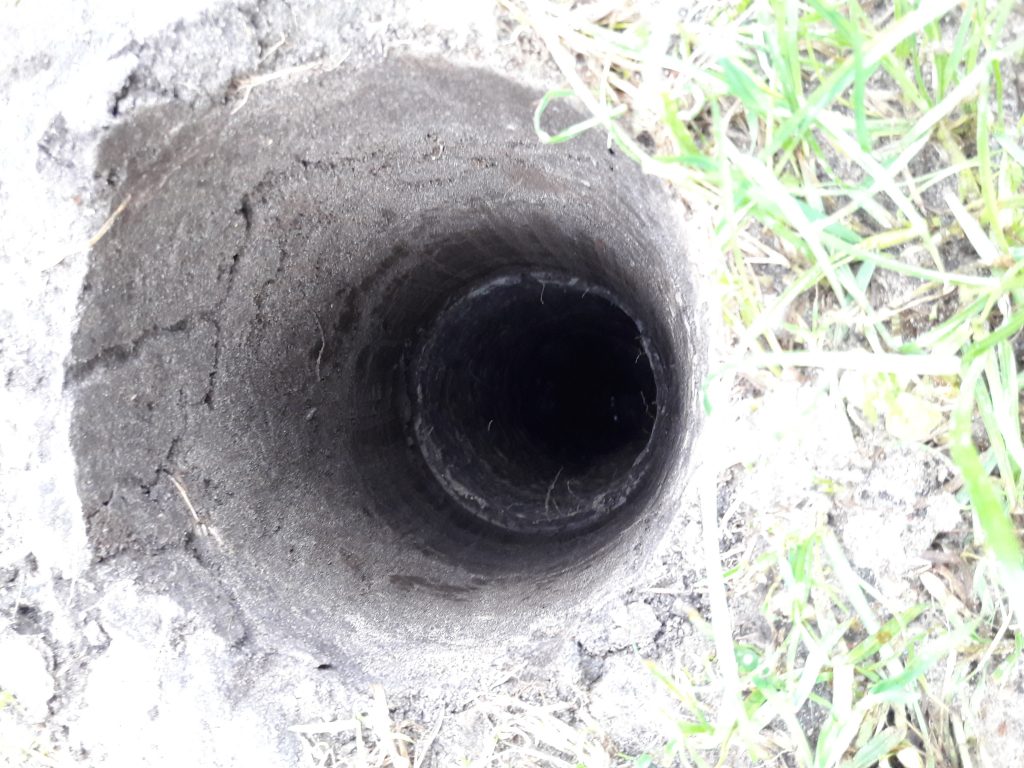
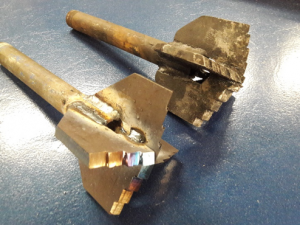
Furthermore, the speed is dependent on the used drill. It was developed further during the drilling attempts. The most successful design, which worked on multiple locations, is shaped like shown in the picture below. The latest version is made of wear-resistant steel (RAEX 400), because of which resharpening is needed less often. Plans have aroused to try the drilling method in harder ground types. Soon the technical drawings of the most recent design will be shared with relevant organisations and will be placed on this website. Also is being looked into further automation of the drilling process. This way we hope to contribute to increasing the accessibility of clean drinking- and irrigation water.


Flower Rope pump

Friday, February 21st, 2020 No Comments

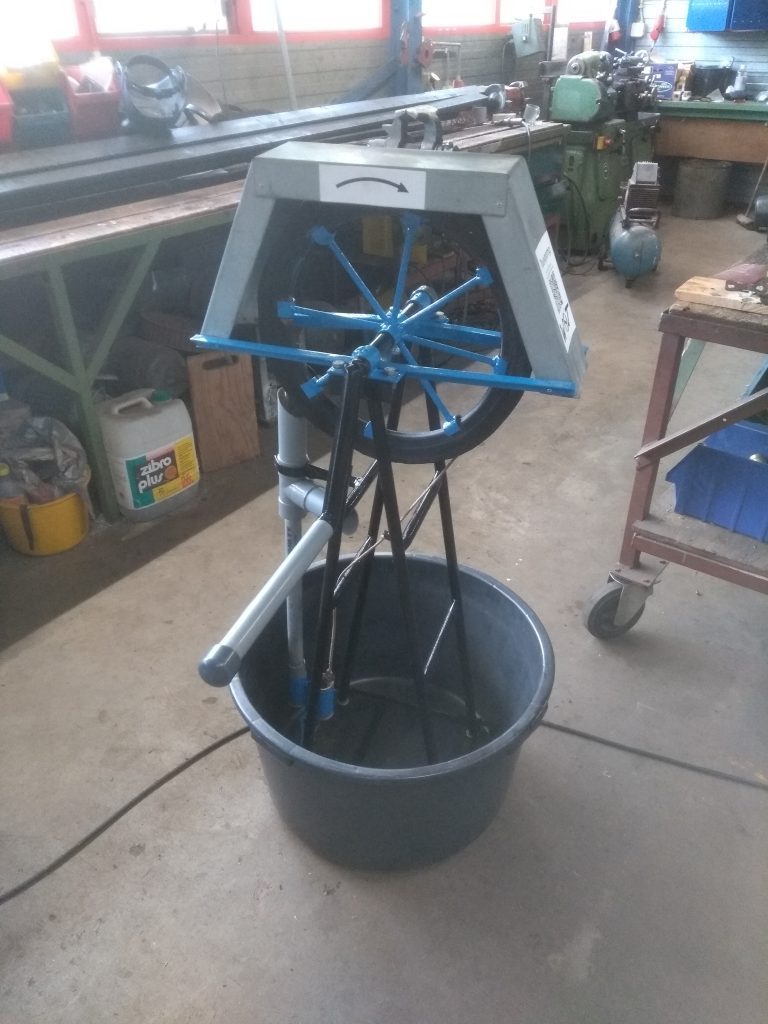
At the beginning of 2019, a request came in from Maarten Rijgersberg, IN KNOWLEDGE / ExpositionRent, a company that rents interactive exhibitions in the field of environment and nature. They were interested in a model made in the past by WOTters in which a rope pump pumped water to another container so that fake flowers slowly floated upwards. They also wanted a normal demonstration model of a rope pump. A model in a mortar tub has been refurbished and repainted. The flower rope pump no longer existed and it was decided to rebuild it. The flower rope pump demonstrates two things: 1. The operation of the rope pump, a very cost-effective pump used a lot in developing areas. At the WOT we have a lot of experience with this type of pump. Read more about it here. 2. The call for more biodiversity through planting more plants is increasing worldwide. Decreasing the amount of pavement in gardens and public spaces is a must, considering the dramatic decline of insect life around the world. According to this study by Radboud University in 2017, there has been a two thirds decrease in the insect life in the past 27 years. Partly with the flower pump rope pump, ExpositionRent, together with other demonstration objects and exhibition materials, wants to direct people to greening gardens and thus stimulating life. The Flower Box Rope Pump can be rented for Festivals & Events, Municipalities, Environmental Education Centers, Visitor Centers and Museums. via the website of ExpositionRent.

Standard rope pump model

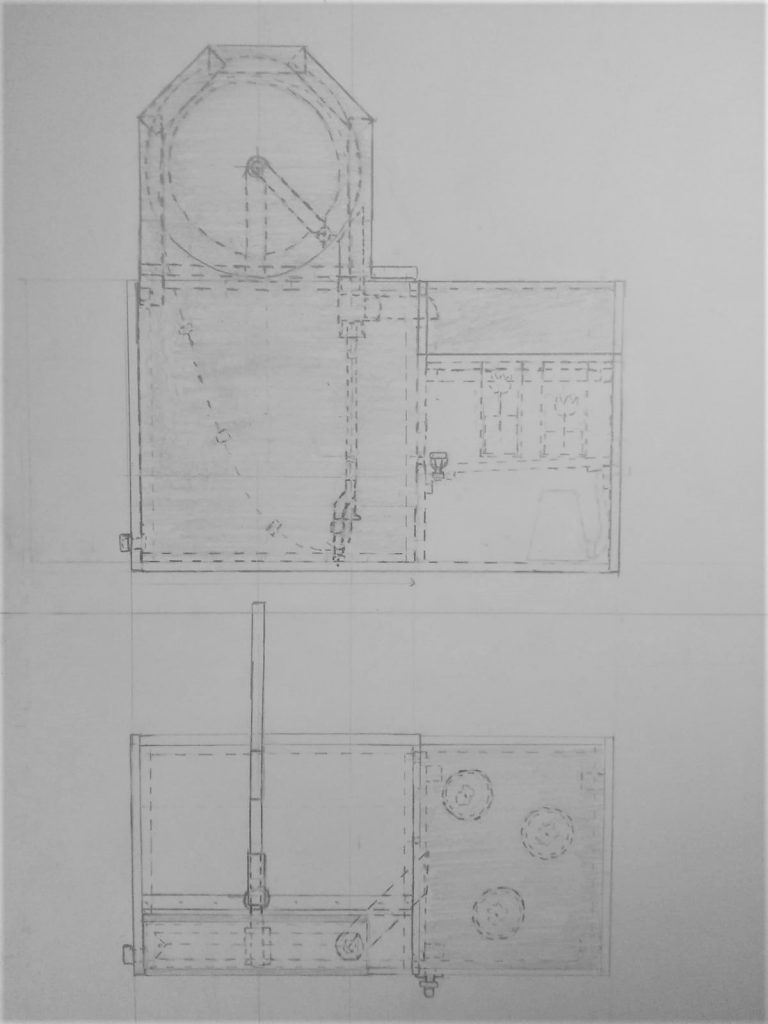
First, a plan was drawn and the design was carefully considered. The model would have the same principle as the previous version, but would be more robust. Due to regulations, it was important that the pump would be child-friendly and that no one could lose their fingers. The entire box would be closed with a number of parts made of transparent plastic so that people could look inside. When the plan seemed comprehensive (that was of course not the case), construction started.

A large sheet of plywood was bought along with a sheet of plastic and a pot of rubber seal. The plate was cut into the correct pieces based on the drawings. This has resulted in a lot of puzzle work and despite the fact that (as usual) something has been cut wrong, everything ended up quite well at this point. Work was also carried out on the PVC parts and steelwork. Furthermore, the flowers had to be made. The plastic rubish from the store turned out to be too fragile. That is why the flowers are made of sheet steel with styrofoam floats.

The box slowly but surely took shape. The wood was covered with a large number of layers of yacht varnish and the metalwork was painted. The outside of the box was also painted and the plastic cut to size. At some point it was time to do the first test with water. The workshop was temporarily transformed into a swimming pool. There were leaks at seams between the wooden plates and at the connection between wood and plastic. More sealant and rubber seal seemed to partially solve the problem. However, accessibility for maintenance proved to be a difficult problem. In order to be able to enter the tank, the top had to be able to come off, so it was not possible to seal everything shut. After the workshop floor already had to endure a lot of moisture, the majority of the leaks have been fixed. When pumping, however, water still splashes around in the top part of the container and some water will leak.

During the work, most of the plastic has been replaced, it has been discovered that silicone sealant that has expired does not harden, that children have to pump very hard to get flowers up and much more. But in the end the model was finished. The container was delivered about ten months after the request. A project that took longer than expected and was more complicated than initially planned, but very educational. And it is of course very nice that a WOT production is now part of an exhibition. Perhaps more models will follow in the future.